

uvloop is a fast, drop-in replacement of the built-in asyncio event loop. uvloop is implemented in Cython and uses libuv under the hood.
The project documentation can be found here.Please also check out the wiki.
uvloop makes asyncio 2-4x faster.
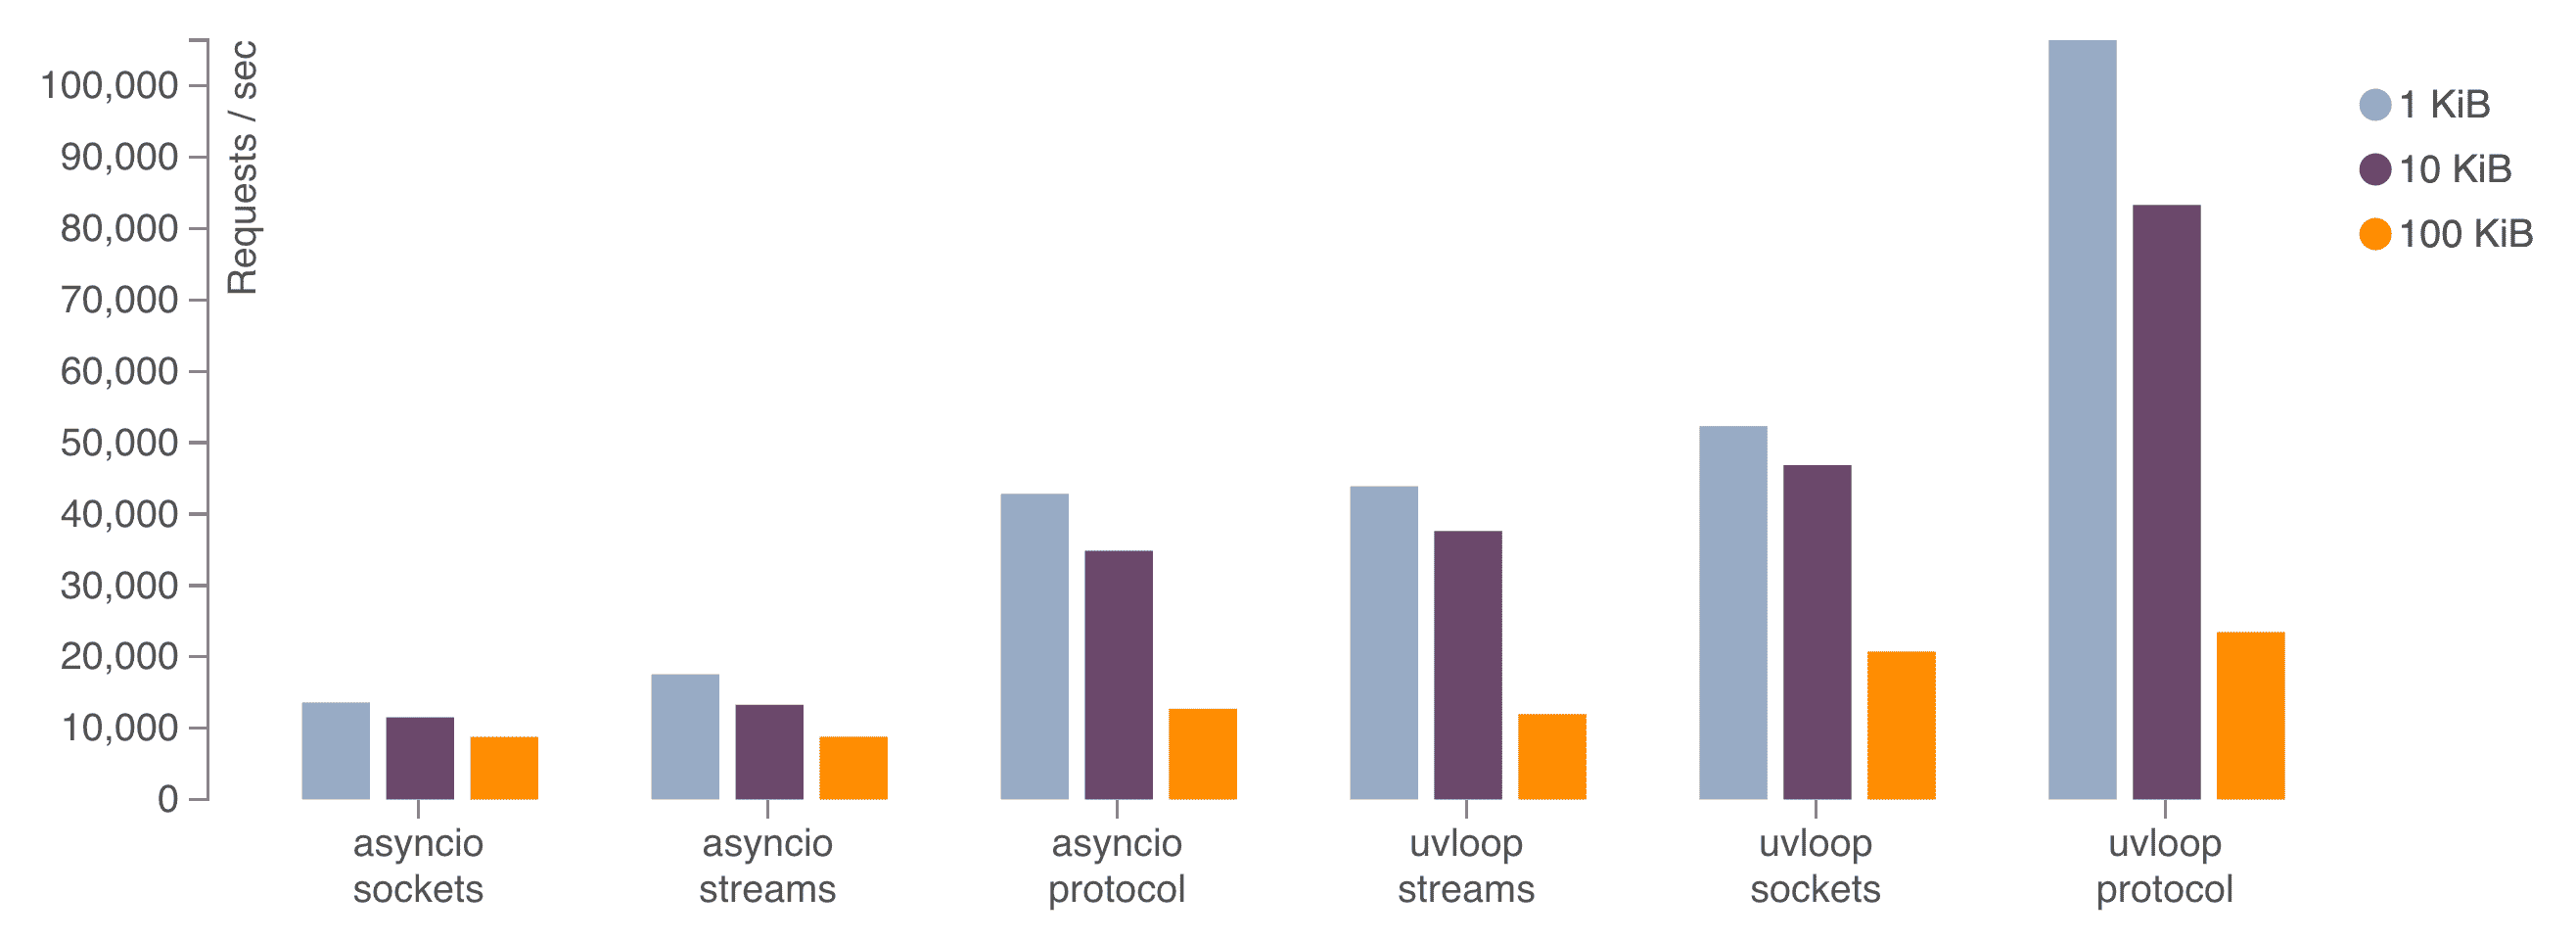
The above chart shows the performance of an echo server with different
message sizes. Thesocketsbenchmark usesloop.sock_recv()and
loop.sock_sendall()methods; thestreamsbenchmark uses asyncio
high-level streams, created by theasyncio.start_server()function;
and theprotocolbenchmark usesloop.create_server()with a simple
echo protocol. Read more about uvloop in a
blog post
about it.
uvloop requires Python 3.8 or greater and is available on PyPI. Use pip to install it:
$ pip install uvloop
Note that it is highly recommended toupgrade pip beforeinstalling uvloop with:
$ pip install -U pip
As of uvloop 0.18, the preferred way of using it is via the
uvloop.run()helper function:
importuvloop

asyncdefmain():
# Main entry-point.
...

uvloop.run(main())uvloop.run()works by simply configuringasyncio.run()
to use uvloop, passing all of the arguments to it, such asdebug,
e.g.uvloop.run(main(), debug=True).
With Python 3.11 and earlier the following alternative snippet can be used:
importasyncio
importsys

importuvloop

asyncdefmain():
# Main entry-point.
...

ifsys.version_info>=(3,11):
withasyncio.Runner(loop_factory=uvloop.new_event_loop)asrunner:
runner.run(main())
else:
uvloop.install()
asyncio.run(main())To build uvloop, you'll need Python 3.8 or greater:
Clone the repository:
$ git clone --recursive git@github:MagicStack/uvloop.git
$ cd uvloop
Create a virtual environment and activate it:
$ Python 3.7 -m venv uvloop-dev
$ source uvloop-dev/bin/activate
Install development dependencies:
$ pip install -e.[dev]
Build and run tests:
$ make
$ make test
uvloop is dual-licensed under MIT and Apache 2.0 licenses.