

QQ giao lưu đàn:815453846 Discord:https://discord.gg/PbJhnZJKDd
Có đoạn thời gian không có giữ gìn cái này hạng mục ( khả năng có hai năm ), nhưng là gần nhất công tác yêu cầu lại lần nữa nghiên cứu một chút Android nguyên sinh tự động hoá, đương nhiên lại điều nghiên Appium, đối lập xuống dưới vừa thấy, phát hiện uiautomator2 cái này hạng mục vận hành tốc độ là thật sự thật nhanh, từ kiểm tra đo lường nguyên tố đến giờ đánh, đều là hào giây cấp, số hiệu cũng tương đối hảo lý giải. Thật là không nghĩ tới trước kia thế nhưng viết ra như vậy thần kỳ hạng mục, tốt như vậy hạng mục như thế nào có thể làm nó lạc hôi đâu, đến hảo hảo chỉnh một chỉnh, một ít rác rưởi số hiệu rửa sạch rửa sạch. Cho nên hạng mục phiên bản từ 2.x.x thăng cấp tới rồi 3.x.x
Còn ở dùng 2.x.x phiên bản người dùng, có thể trước xem một chút2to3Lại quyết định hay không muốn thăng cấp 3.x.x ( ta cá nhân còn là phi thường kiến nghị thăng cấp )
2 đến 3 dù sao cũng là đại phiên bản thăng cấp, rất nhiều hàm số xóa rớt. Đầu tiên xóa rớt chính là atx-agent, tiếp theo còn có một đống atx-agent tương quan hàm số. Vứt đi công năng tỷ như init.
Các loại ỷ lại kho phiên bản hào


UiAutomatorLà Google cung cấp dùng để làm an trác tự động hoá thí nghiệm một cái Java kho, căn cứ vào Accessibility phục vụ. Công năng rất mạnh, có thể đối kẻ thứ ba App tiến hành thí nghiệm, thu hoạch trên màn hình tùy ý một cái APP tùy ý một cái khống kiện thuộc tính, cũng đối này tiến hành tùy ý thao tác, nhưng có hai cái khuyết điểm: 1. Thí nghiệm kịch bản gốc chỉ có thể sử dụng Java ngôn ngữ 2. Thí nghiệm kịch bản gốc muốn đóng gói thành jar hoặc là apk bao thượng truyền tới thiết bị thượng mới có thể vận hành.
Chúng ta hy vọng thí nghiệm logic có thể dùng Python biên soạn, có thể ở trên máy tính vận hành thời điểm liền khống chế di động. Nơi này muốn phi thường cảm tạ Xiaocong He (@xiaocong), hắn đem cái này ý tưởng thực hiện ra tới ( thấyxiaocong/uiautomator), nguyên lý là ở trên di động vận hành một cái http rpc phục vụ, đem uiautomator trung công năng mở ra ra tới, sau đó lại đem này đó http tiếp lời phong giả dạng làm Python kho.
Bởi vìxiaocong/uiautomatorCái này kho, đã thật lâu không thấy đổi mới. Cho nên chúng ta trực tiếp fork một cái phiên bản, vì phương tiện làm phân chia chúng ta liền ở phía sau bỏ thêm cái 2openatx/uiautomator2,Đối ứng Android bao nguyên mã ta cũng fork một phần,openatx/android-uiautomator-server
Trừ bỏ đối vốn có kho bug tiến hành rồi chữa trị, còn gia tăng rồi rất nhiều tân Feature. Chủ yếu có dưới bộ phận:
Thiết bị cùng khai phá cơ có thể thoát ly cáp sạc, thông qua WiFi lẫn nhau liên ( căn cứ vàoatx-agentTổng thểopenstf/minicapĐạt tới thật khi màn hình đầu tần, cùng với thật khi chụp hìnhTổng thểopenstf/minitouchĐạt tới chính xác thật khi khống chế thiết bị- Chữa trịxiaocong/uiautomatorThường xuyên tính rời khỏi vấn đề
- Số hiệu tiến hành rồi trọng cấu cùng tinh giản, phương tiện giữ gìn
- Thực hiện một cái thiết bị quản lý ngôi cao ( cũng duy trì iOS)atxserver2( chú: Trước mắt không thế nào giữ gìn )
- Mở rộng toast thu hoạch cùng triển lãm công năng ( yêu cầu tay động mở ra ATX huyền phù cửa sổ quyền hạn ) giống như có bug không dùng được
Nơi này muốn trước nói minh hạ, bởi vì thường xuyên có rất nhiều người hỏi openatx/uiautomator2 cũng không duy trì iOS thí nghiệm, yêu cầu iOS tự động hoá thí nghiệm, có thể chuyển tới cái này khoopenatx/facebook-wda.
PS: Cái này kho
https://github /NeteaseGame/ATXTrước mắt đã không giữ gìn, thỉnh mau chóng đổi mới.
Nơi này có một phần nhanh chóng tham khảo, thích hợp đã nhập môn ngườiQUICK REFERENCE GUIDE,Hoan nghênh nói thêm ý kiến.
- Android phiên bản 4.4+
- Python 3.8+
Trước chuẩn bị một đài ( không cần hai đài ) mở raKhai phá giả lựa chọnAn trác di động, liên tiếp thượng máy tính, bảo đảm chấp hànhadb devicesCó thể nhìn đến liên tiếp thượng thiết bị.
Vận hànhpip3 install -U uiautomator2Trang bị uiautomator2
Mệnh lệnh hành vận hànhPythonMở ra Python lẫn nhau cửa sổ. Sau đó đem phía dưới mệnh lệnh đưa vào đến cửa sổ trung.
importuiautomator2asu2

d=u2.connect()# connect to device
print(d.info)
Lúc này nhìn đến cùng loại phía dưới phát ra, liền có thể chính thức bắt đầu dùng chúng ta cái này kho. Bởi vì cái này kho công năng quá nhiều, mặt sau còn có rất nhiều nội dung, yêu cầu chậm rãi đi xem....
{'currentPackageName': 'net.oneplus.launcher', 'displayHeight': 1920, 'displayRotation': 0, 'displaySizeDpX': 411, 'displaySizeDpY': 731, 'displayWidth': 1080, 'productName': 'OnePlus5', '
screenOn': True, 'sdkInt': 27, 'naturalOrientation': True}
Mặt khác vì bảo trì ổn định, còn cần mở raTiểu hoàng xeHuyền phù cửa sổ quyền hạn. Tham khảo văn chươngpy-uiautomator2 thông qua huyền phù cửa sổ làm phục vụ thời gian dài nhưng dùng
Trong tình huống bình thường đều sẽ thành công, bất quá cũng có thể sẽ có ngoài ý muốn. Có thể thêm QQ đàn phản hồi vấn đề ( đàn hào ở trên cùng ), trong đàn có rất nhiều đại lão có thể giúp ngươi giải quyết vấn đề.
Thank you to all our sponsors! ✨🍰✨
Empty
Ưu tú văn chương đề cử ( hoan nghênh QQ trong đàn at ta phản hồi )
- termux như thế nào bố trí uiautomator2 tóm tắtby
Thành đô - thí nghiệm chỉ biết một chút
- Căn cứ vào adb hiệp nghị cùng Android tiến hành lẫn nhau khoadbutils
- uiauto.devDùng cho xem xét UI tầng cấp kết cấu, cùng loại với uiautomatorviewer( dùng cho thay thế phía trước viết weditor ), dùng cho xem xét UI tầng cấp kết cấu
- Thiết bị quản lý ngôi cao, thiết bị nhiều liền sẽ dùng đếnatxserver2( tìm kiếm hạng mục giữ gìn nhân viên )
atx-agentVận hành ở thiết bị thượng đóng giữ trình tự, go khai phá, dùng cho bảo sống thiết bị thượng tương quan phục vụweditorCùng loại với uiautomatorviewer, chuyên môn vì bổn hạng mục khai phá phụ trợ biên tập khí ( cái này tạm không giữ gìn
- Install an app
- Launch an app
- Stop an app
- Stop all running apps
- Push and pull files
- Other app operations
cheme)**

**[UI automation](#basic-api-usages)**
- **[Shell commands](#shell-commands)**
- **[Session](#session)**
- **[Retrieve the device info](#retrieve-the-device-info)**
- **[Key Events](#key-events)**
- **[Gesture interaction with the device](#gesture-interaction-with-the-device)**
- **[Screen-related](#screen-related)**
- **[Selector](#selector)**
- **[Watcher](#watcher)**
- **[Global settings](#global-settings)**
- **[Input method](#input-method)**
- **[Toast](#toast)**
- **[XPath](#xpath)**
- **[Screenrecord](#screenrecord)**
- **[Image match](#image-match) Removed**


**[Contributors](#contributors)**

**[LICENSE](#license)**


# Installation
1. Install uiautomator2

```bash
pip install -U uiautomator2
```

Thí nghiệm hay không trang bị thành công `uiautomator2 --help`

2. UI Inspector

```bash
pip install uiautodev
# khởi động
uiauto.dev
```

Trình duyệt mở ra https://uiauto.dev xem xét trước mặt thiết bị giao diện kết cấu.

**uiauto.dev**

[uiauto.dev](https://github /codeskyblue/uiauto.dev) là một cái độc lập cùng uiautomator2 ở ngoài một cái hạng mục, dùng cho xem xét đồ tầng kết cấu. Thuộc về cũ bản hạng mục [weditor trọng cấu phiên bản ](https://github /openatx/weditor), kế tiếp có lẽ sẽ thu phí ( giá cả khẳng định ngon bổ rẻ ), tới duy trì trước mặt cái này hạng mục tiếp tục giữ gìn đi xuống. Cảm thấy hứng thú có thể thêm đàn thảo luận ( cũng bao hàm đề nhu cầu ) QQ đàn 536481989

# Connect to a device
use serialno to connect device eg. `123456f` (seen from `adb devices`)

``` Python
import uiautomator2 as u2

d = u2.connect('123456f') # alias for u2.connect_usb('123456f')
print(d.info)
Serial can be passed through env-varANDROID_SERIAL
# export ANDROID_SERIAL=123456f
d=u2.connect()Trong đó$device_ipĐại biểu thiết bị ip địa chỉ
Như cần chỉ định thiết bị yêu cầu truyền vào--serialNhưPython 3 -m uiautomator2 --serial bff1234 <SubCommand>,SubCommand vì tử mệnh lệnh ( screenshot, current chờ )
1.0.3 Added:
Python 3 -m uiautomator2equals touiautomator2
-
screenshot: Chụp hình
$ uiautomator2 screenshot screenshot.jpg
-
current: Thu hoạch trước mặt bao danh cùng activity
$ uiautomator2 current { "package":"com.android.browser", "activity":"com.uc.browser.InnerUCMobile", "pid":28478 } -
uninstall: Uninstall app
$ uiautomator2 uninstall<package-name>#Tháo dỡ một cái bao
$ uiautomator2 uninstall<package-name-1><package-name-2>#Tháo dỡ nhiều bao
$ uiautomator2 uninstall --all#Toàn bộ tháo dỡ
-
stop: Stop app
$ uiautomator2 stop com.example.app#Đình chỉ một cái app
$ uiautomator2 stop --all#Đình chỉ sở hữu app
-
doctor:
$ uiautomator2 doctor
[I 2024-04-25 19:53:36,288 __main__:101 pid:15596] uiautomator2 is OK
When Python quit, the UiAutomation service also quit.
Đóng dấu ra số hiệu sau lưng HTTP thỉnh cầu tin tức
>>>d.debug=True
>>>d.info
12:32:47.182$curl-XPOST-d'{ "jsonrpc": "2.0", "id": "b80d3a488580be1f3e9cb3e926175310", "method": "deviceInfo", "params": {}}''http://127.0.0.1:54179/jsonrpc/0'
12:32:47.225Response>>>
{"jsonrpc":"2.0","id":"b80d3a488580be1f3e9cb3e926175310","result":{"currentPackageName":"com.android.mms","displayHeight":1920,"displayRotation":0,"displaySizeDpX":360,"displaySizeDpY":640,"displayWidth":1080,"productName"
:"odin","screenOn":true,"sdkInt":25,"naturalOrientation":true}}
<<<ENDThiết trí nguyên tố tra tìm chờ đợi thời gian ( cam chịu 20s )
d.implicitly_wait(10.0)# cũng có thể thông qua d.settings['wait_timeout'] = 10.0 sửa chữa
d(text="Settings").click()# if Settings button not show in 10s, UiObjectNotFoundError will raised

print("wait timeout",d.implicitly_wait())# get default implicit wait
This function will have influence onclick,long_click,drag_to,get_text,set_text,clear_text,etc.
This part showcases how to perform app management
We only support installing an APK from a URL
d.app_install('http://some-domain /some.apk')# cam chịu loại này phương pháp là trước thông qua atx-agent phân tích apk bao mainActivity, sau đó thuyên chuyển am start -n $package/$activity khởi động
d.app_start("com.example.hello_world")
# sử dụng monkey -p com.example.hello_world -c android.intent.category.LAUNCHER 1 khởi động
# loại này phương pháp có cái tác dụng phụ, nó tự động sẽ đưa điện thoại di động xoay tròn tỏa định cấp tắt đi
d.app_start("com.example.hello_world",use_monkey=True)# start with package name
# thông qua chỉ định main activity phương thức khởi động ứng dụng, đồng giá với thuyên chuyển am start -n com.example.hello_world/.MainActivity
d.app_start("com.example.hello_world",".MainActivity")# equivalent to `am force-stop`, thus you could lose data
d.app_stop("com.example.hello_world")
# equivalent to `pm clear`
d.app_clear('com.example.hello_world')# stop all
d.app_stop_all()
# stop all app except for com.examples.demo
d.app_stop_all(excludes=['com.examples.demo'])d.app_info("com.examples.demo")
# expect output
#{
# "mainActivity": "com.github.uiautomator.MainActivity",
# "label": "ATX",
# "versionName": "1.1.7",
# "versionCode": 1001007,
# "size":1760809
#}
# save app icon
img=d.app_icon("com.examples.demo")
img.save("icon.png")d.app_list_running()
# expect output
# [ "com.xxxx.xxxx", "com.github.uiautomator", "xxxx" ]pid=d.app_wait("com.example.android")# chờ đợi ứng dụng vận hành, return pid(int)
ifnotpid:
print("com.example.android is not running")
else:
print("com.example.android pid is %d"%pid)
d.app_wait("com.example.android",front=True)# chờ đợi ứng dụng trước đài vận hành
d.app_wait("com.example.android",timeout=20.0)# dài nhất chờ đợi thời gian 20s ( cam chịu )Added in version 1.2.0
-
push a file to the device
# push to a folder
d.push("foo.txt","/sdcard/")
# push and rename
d.push("foo.txt","/sdcard/bar.txt")
# push fileobj
withopen("foo.txt",'rb')asf:
d.push(f,"/sdcard/")
# push and change file access mode
d.push("foo.sh","/data/local/tmp/",mode=0o755)
-
pull a file from the device
d.pull("/sdcard/tmp.txt","tmp.txt")

# FileNotFoundError will raise if the file is not found on the device
d.pull("/sdcard/some-file-not-exists.txt","tmp.txt")
# grant all the permissions
d.app_auto_grant_permissions("io.appium.android.apis")

# open scheme
d.open_url("appname://appnamehost")
# same as
# adb shell am start -a android.intent.action.VIEW -d "appname://appnamehost"This part showcases how to perform common device operations:
-
Run a short-lived shell command with a timeout protection. (Default timeout 60s)
Note: timeout support require
atx-agent >=0.3.3adb_shellfunction is deprecated. Useshellinstead.Simple usage
output,exit_code=d.shell("pwd",timeout=60)# timeout 60s (Default)
# output: "/\n", exit_code: 0
# Similar to command: adb shell pwd

# Since `shell` function return type is `namedtuple( "ShellResponse", ( "output", "exit_code" ))`
# so we can do some tricks
output=d.shell("pwd").output
exit_code=d.shell("pwd").exit_code
The first argument can be list. for example
output,exit_code=d.shell(["ls","-l"])
# output: "/....", exit_code: 0
This returns a string for stdout merged with stderr. If the command is a blocking command,
shellwill also block until the command is completed or the timeout kicks in. No partial output will be received during the execution of the command. This API is not suitable for long-running commands. The shell command given runs in a similar environment ofadb shell,which has a Linux permission level ofadborshell(higher than an app permission). -
Run a long-running shell command (Removed)
Session represent an app lifecycle. Can be used to start app, detect app crash.
-
Launch and close app
sess=d.session("com.netease.cloudmusic")# start võng dễ vân âm nhạc
sess.close()# đình chỉ võng dễ vân âm nhạc
sess.restart()# lãnh khởi động võng dễ vân âm nhạc
-
Use Python
withto launch and close appwithd.session("com.netease.cloudmusic")assess: sess(text="Play").click()
-
Attach to the running app
# launch app if not running, skip launch if already running
sess=d.session("com.netease.cloudmusic",attach=True)
-
Detect app crash
# When app is still running
sess(text="Music").click()# operation goes normal

# If app crash or quit
sess(text="Music").click()# raise SessionBrokenError
# other function calls under session will raise SessionBrokenError too
# check if session is ok.
# Warning: function name may change in the future
sess.running()# True or False
Get basic information
d.infoBelow is a possible output:
{'currentPackageName': 'com.android.systemui',
'displayHeight': 1560,
'displayRotation': 0,
'displaySizeDpX': 360,
'displaySizeDpY': 780,
'displayWidth': 720,
'naturalOrientation': True,
'productName': 'ELE-AL00',
'screenOn': True,
'sdkInt': 29}
Get window size
print(d.window_size())
# device upright output example: (1080, 1920)
# device horizontal output example: (1920, 1080)
Get current app info. For some android devices, the output could be empty (seeOutput example 3)
print(d.app_current())
# Output example 1: {'activity': '.Client', 'package': 'com.netease.example', 'pid': 23710}
# Output example 2: {'activity': '.Client', 'package': 'com.netease.example'}
# Output example 3: {'activity': None, 'package': None}
Wait activity
d.wait_activity(".ApiDemos",timeout=10)# default timeout 10.0 seconds
# Output: true of false
Get device serial number
print(d.serial)
# output example: 74aAEDR428Z9
Get WLAN ip
print(d.wlan_ip)
# output example: 10.0.0.1 or None
Get detailed device infod.device_info
device_info
print(d.device_info)Below is a possible output:
{'arch': 'arm64-v8a',
'brand': 'google',
'model': 'sdk_gphone64_arm64',
'sdk': 34,
'serial': 'EMULATOR34X1X19X0',
'version': 14}
Get of set clipboard content
Thiết trí dán bản nội dung hoặc thu hoạch nội dung
-
clipboard/set_clipboard
d.clipboard='hello-world'
# or
d.set_clipboard('hello-world','label')
Get clipboard content
get clipboard requires IME(com.github.uiautomator/.AdbKeyboard) call
d.set_input_ime()before using it.
``` Python

# get clipboard content
print(d.clipboard)
```
-
Turn on/off screen
d.screen_on()# turn on the screen
d.screen_off()# turn off the screen
-
Get current screen status
d.info.get('screenOn')# require Android >= 4.4
-
Press hard/soft key
d.press("home")# press the home key, with key name
d.press("back")# press the back key, with key name
d.press(0x07,0x02)# press keycode 0x07('0') with META ALT(0x02)
-
These key names are currently supported:
- home
- back
- left
- right
- up
- down
- center
- menu
- search
- enter
- delete ( or del)
- recent (recent apps)
- volume_up
- volume_down
- volume_mute
- camera
- power
You can find all key code definitions atAndroid KeyEvnet
-
Unlock screen
d.unlock()
# This is equivalent to
# 1. press( "power" )
# 2. swipe from left-bottom to right-top
-
Click on the screen
d.click(x,y)
-
Double click
d.double_click(x,y)
d.double_click(x,y,0.1)# default duration between two click is 0.1s
-
Long click on the screen
d.long_click(x,y)
d.long_click(x,y,0.5)# long click 0.5s (default)
-
Swipe
d.swipe(sx,sy,ex,ey)
d.swipe(sx,sy,ex,ey,0.5)# swipe for 0.5s(default)
-
SwipeExt mở rộng công năng
d.swipe_ext("right")# ngón tay hữu hoạt, 4 tuyển 1 "left", "right", "up", "down"
d.swipe_ext("right",scale=0.9)# cam chịu 0.9, hoạt động khoảng cách vì màn hình độ rộng 90%
d.swipe_ext("right",box=(0,0,100,100))# ở (0,0) -> (100, 100) cái này khu vực làm hoạt động

# thực tiễn phát hiện thượng hoạt hoặc trượt xuống thời điểm, từ giữa giờ bắt đầu hoạt động xác suất thành công sẽ cao một ít
d.swipe_ext("up",scale=0.8)# số hiệu sẽ vkk

# còn có thể sử dụng Direction làm tham số
fromuiautomator2importDirection

d.swipe_ext(Direction.FORWARD)# giao diện hạ phiên, đồng giá với d.swipe_ext( "up" ), chỉ là càng tốt lý giải
d.swipe_ext(Direction.BACKWARD)# giao diện thượng phiên
d.swipe_ext(Direction.HORIZ_FORWARD)# giao diện trình độ hữu phiên
d.swipe_ext(Direction.HORIZ_BACKWARD)# giao diện trình độ tả phiên
-
Drag
d.drag(sx,sy,ex,ey)
d.drag(sx,sy,ex,ey,0.5)# swipe for 0.5s(default)
-
Swipe points
# swipe from point(x0, y0) to point(x1, y1) then to point(x2, y2)
# time will speed 0.2s bwtween two points
d.swipe_points([(x0,y0), (x1,y1), (x2,y2)],0.2))
Đa dụng với cửu cung cách giải khóa, trước tiên thu hoạch đến mỗi cái điểm tương đối tọa độ ( nơi này duy trì tỉ lệ phần trăm ), Càng kỹ càng tỉ mỉ sử dụng tham khảo cái này thiệpSử dụng u2 thực hiện cửu cung đồ án giải khóa
-
Touch and drap (Beta)
Cái này tiếp lời thuộc về tương đối tầng dưới chót nguyên thủy tiếp lời, cảm giác cũng không hoàn thiện, bất quá chắp vá có thể sử dụng. Chú: Cái này địa phương cũng không duy trì tỉ lệ phần trăm
d.touch.down(10,10)# bắt chước ấn xuống
time.sleep(.01)# down cùng move chi gian lùi lại, chính mình khống chế
d.touch.move(15,15)# bắt chước di động
d.touch.up(10,10)# bắt chước nâng lên
Note: click, swipe, drag operations support percentage position values. Example:
d.long_click(0.5, 0.5)means long click center of screen
-
Retrieve/Set device orientation
The possible orientations:
naturalornleftorlrightorrupsidedownoru(can not be set)
# retrieve orientation. the output could be "natural" or "left" or "right" or "upsidedown"
orientation=d.orientation

# WARNING: not pass testing in my TT-M1
# set orientation and freeze rotation.
# notes: setting "upsidedown" requires Android>=4.3.
d.set_orientation('l')# or "left"
d.set_orientation("l")# or "left"
d.set_orientation("r")# or "right"
d.set_orientation("n")# or "natural"
-
Freeze/Un-freeze rotation
# freeze rotation
d.freeze_rotation()
# un-freeze rotation
d.freeze_rotation(False)
-
Take screenshot
# take screenshot and save to a file on the computer, require Android>=4.2.
d.screenshot("home.jpg")

# get PIL.Image formatted images. Naturally, you need pillow installed first
image=d.screenshot()# default format= "pillow"
image.save("home.jpg")# or home.png. Currently, only png and jpg are supported

# get opencv formatted images. Naturally, you need numpy and cv2 installed first
importcv2
image=d.screenshot(format='opencv')
cv2.imwrite('home.jpg',image)

# get raw jpeg data
imagebin=d.screenshot(format='raw')
open("some.jpg","wb").write(imagebin)
-
Dump UI hierarchy
# get the UI hierarchy dump content
xml=d.dump_hierarchy()

# compressed=True: include not import nodes
# pretty: format xml
# max_depth: limit xml depth, default 50
xml=d.dump_hierarchy(compressed=False,pretty=False,max_depth=50)
-
Open notification or quick settings
d.open_notification()
d.open_quick_settings()
Selector is a handy mechanism to identify a specific UI object in the current window.
# Select the object with text 'Clock' and its className is 'android.widget.TextView'
d(text='Clock',className='android.widget.TextView')
Selector supports below parameters. Refer toUiSelector Java docfor detailed information.
text,textContains,textMatches,textStartsWithclassName,classNameMatchesdescription,descriptionContains,descriptionMatches,descriptionStartsWithcheckable,checked,clickable,longClickablescrollable,enabled,focusable,focused,selectedpackageName,packageNameMatchesresourceId,resourceIdMatchesindex,instance
-
children
# get the children or grandchildren
d(className="android.widget.ListView").child(text="Bluetooth")
-
siblings
# get siblings
d(text="Google").sibling(className="android.widget.ImageView")
-
children by text or description or instance
# get the child matching the condition className= "android.widget.LinearLayout"
# and also its children or grandchildren with text "Bluetooth"
d(className="android.widget.ListView",resourceId="android:id/list") \
.child_by_text("Bluetooth",className="android.widget.LinearLayout")

# get children by allowing scroll search
d(className="android.widget.ListView",resourceId="android:id/list") \
.child_by_text(
"Bluetooth",
allow_scroll_search=True,
className="android.widget.LinearLayout"
)
-
child_by_descriptionis to find children whose grandchildren have the specified description, other parameters being similar tochild_by_text. -
child_by_instanceis to find children with has a child UI element anywhere within its sub hierarchy that is at the instance specified. It is performed on visible viewswithout scrolling.
See below links for detailed information:
- UiScrollable,
getChildByDescription,getChildByText,getChildByInstance - UiCollection,
getChildByDescription,getChildByText,getChildByInstance
Above methods support chained invoking, e.g. for below hierarchy
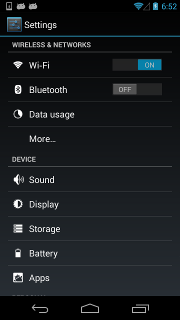
<nodeindex="0"text=""resource-id="android:id/list"class="android.widget.ListView"...>
<nodeindex="0"text="WIRELESS&NETWORKS"resource-id=""class="android.widget.TextView".../>
<nodeindex="1"text=""resource-id=""class="android.widget.LinearLayout"...>
<nodeindex="1"text=""resource-id=""class="android.widget.RelativeLayout"...>
<nodeindex="0"text="Wi‑Fi"resource-id="android:id/title"class="android.widget.TextView".../>
</node>
<nodeindex="2"text="ON"resource-id="com.android.settings:id/switchWidget"class="android.widget.Switch".../>
</node>
...
</node>
To click the switch widget right to the TextView 'Wi‑Fi', we need to select the switch widgets first. However, according to the UI hierarchy, more than one switch widgets exist and have almost the same properties. Selecting by className will not work. Alternatively, the below selecting strategy would help:
d(className="android.widget.ListView",resourceId="android:id/list") \
.child_by_text("Wi‑Fi",className="android.widget.LinearLayout") \
.child(className="android.widget.Switch") \
.click()
-
-
relative positioning
Also we can use the relative positioning methods to get the view:
left,right,top,bottom.d(A).left(B),selects B on the left side of A.d(A).right(B),selects B on the right side of A.d(A).up(B),selects B above A.d(A).down(B),selects B under A.
So for above cases, we can alternatively select it with:
## select "switch" on the right side of "Wi‑Fi"
d(text="Wi‑Fi").right(className="android.widget.Switch").click()
-
Multiple instances
Sometimes the screen may contain multiple views with the same properties, e.g. text, then you will have to use the "instance" property in the selector to pick one of qualifying instances, like below:
d(text="Add new",instance=0)# which means the first instance with text "Add new"
In addition, uiautomator2 provides a list-like API (similar to jQuery):
# get the count of views with text "Add new" on current screen
d(text="Add new").count

# same as count property
len(d(text="Add new"))

# get the instance via index
d(text="Add new")[0]
d(text="Add new")[1]
...

# iterator
forviewind(text="Add new"):
view.info#...
Notes:when using selectors in a code block that walk through the result list, you must ensure that the UI elements on the screen keep unchanged. Otherwise, when Element-Not-Found error could occur when iterating through the list.
-
Check if the specific UI object exists
d(text="Settings").exists# True if exists, else False
d.exists(text="Settings")# alias of above property.

# advanced usage
d(text="Settings").exists(timeout=3)# wait Settings appear in 3s, same as.wait(3)
-
Retrieve the info of the specific UI object
d(text="Settings").info
Below is a possible output:
{ u'contentDescription': u'', u'checked': False, u'scrollable': False, u'text': u'Settings', u'packageName': u'com.android.launcher', u'selected': False, u'enabled': True, u'bounds': {u'top': 385, u'right': 360, u'bottom': 585, u'left': 200}, u'className': u'android.widget.TextView', u'focused': False, u'focusable': True, u'clickable': True, u'chileCount': 0, u'longClickable': True, u'visibleBounds': {u'top': 385, u'right': 360, u'bottom': 585, u'left': 200}, u'checkable': False } -
Get/Set/Clear text of an editable field (e.g., EditText widgets)
d(text="Settings").get_text()# get widget text
d(text="Settings").set_text("My text...")# set the text
d(text="Settings").clear_text()# clear the text
-
Get Widget center point
x,y=d(text="Settings").center()
# x, y = d(text= "Settings" ).center(offset=(0, 0)) # left-top x, y
-
Take screenshot of widget
im=d(text="Settings").screenshot()
im.save("settings.jpg")
-
Perform click on the specific object
# click on the center of the specific ui object
d(text="Settings").click()

# wait element to appear for at most 10 seconds and then click
d(text="Settings").click(timeout=10)

# click with offset(x_offset, y_offset)
# click_x = x_offset * width + x_left_top
# click_y = y_offset * height + y_left_top
d(text="Settings").click(offset=(0.5,0.5))# Default center
d(text="Settings").click(offset=(0,0))# click left-top
d(text="Settings").click(offset=(1,1))# click right-bottom

# click when exists in 10s, default timeout 0s
clicked=d(text='Skip').click_exists(timeout=10.0)

# click until element gone, return bool
is_gone=d(text="Skip").click_gone(maxretry=10,interval=1.0)# maxretry default 10, interval default 1.0
-
Perform long click on the specific UI object
# long click on the center of the specific UI object
d(text="Settings").long_click()
-
Drag the UI object towards another point or another UI object
# notes: drag can not be used for Android<4.3.
# drag the UI object to a screen point (x, y), in 0.5 second
d(text="Settings").drag_to(x,y,duration=0.5)
# drag the UI object to (the center position of) another UI object, in 0.25 second
d(text="Settings").drag_to(text="Clock",duration=0.25)
-
Swipe from the center of the UI object to its edge
Swipe supports 4 directions:
- left
- right
- top
- bottom
d(text="Settings").swipe("right")
d(text="Settings").swipe("left",steps=10)
d(text="Settings").swipe("up",steps=20)# 1 steps is about 5ms, so 20 steps is about 0.1s
d(text="Settings").swipe("down",steps=20)
-
Two-point gesture from one point to another
d(text="Settings").gesture((sx1,sy1), (sx2,sy2), (ex1,ey1), (ex2,ey2))
-
Two-point gesture on the specific UI object
Supports two gestures:
In,from edge to centerOut,from center to edge
# notes: pinch can not be set until Android 4.3.
# from edge to center. here is "In" not "in"
d(text="Settings").pinch_in(percent=100,steps=10)
# from center to edge
d(text="Settings").pinch_out()
-
Wait until the specific UI appears or disappears
# wait until the ui object appears
d(text="Settings").wait(timeout=3.0)# return bool
# wait until the ui object gone
d(text="Settings").wait_gone(timeout=1.0)
The default timeout is 20s. seeglobal settingsfor more details
-
Perform fling on the specific ui object(scrollable)
Possible properties:
horizorvertforwardorbackwardortoBeginningortoEnd
# fling forward(default) vertically(default)
d(scrollable=True).fling()
# fling forward horizontally
d(scrollable=True).fling.horiz.forward()
# fling backward vertically
d(scrollable=True).fling.vert.backward()
# fling to beginning horizontally
d(scrollable=True).fling.horiz.toBeginning(max_swipes=1000)
# fling to end vertically
d(scrollable=True).fling.toEnd()
-
Perform scroll on the specific ui object(scrollable)
Possible properties:
horizorvertforwardorbackwardortoBeginningortoEnd,orto
# scroll forward(default) vertically(default)
d(scrollable=True).scroll(steps=10)
# scroll forward horizontally
d(scrollable=True).scroll.horiz.forward(steps=100)
# scroll backward vertically
d(scrollable=True).scroll.vert.backward()
# scroll to beginning horizontally
d(scrollable=True).scroll.horiz.toBeginning(steps=100,max_swipes=1000)
# scroll to end vertically
d(scrollable=True).scroll.toEnd()
# scroll forward vertically until specific ui object appears
d(scrollable=True).scroll.to(text="Security")
Trước mắt cái này watch_context là dùng threading khởi động, mỗi 2s kiểm tra một lần Trước mắt còn chỉ có click này một loại kích phát thao tác
withd.watch_context()asctx:
# đương đồng thời xuất hiện ( lập tức download hoặc lập tức đổi mới ) cùng hủy bỏ cái nút thời điểm, điểm đánh hủy bỏ
ctx.when("^ lập tức ( download | đổi mới )").when("Hủy bỏ").click()
ctx.when("Đồng ý").click()
ctx.when("Xác định").click()
# mặt trên tam hành số hiệu là lập tức chấp hành xong, sẽ không có cái gì chờ đợi

ctx.wait_stable()# mở ra pop-up theo dõi, cũng chờ đợi giao diện ổn định ( hai cái pop-up kiểm tra chu kỳ nội không có pop-up đại biểu ổn định )

# sử dụng call hàm số tới kích phát hàm số hồi điều
# call duy trì hai cái tham số, d cùng el, không phân chia tham số vị trí, có thể bất truyền tham, nếu truyền tham lượng biến đổi danh không thể viết sai
# eg: Đương có nguyên tố xứng đôi giữa mùa hạ chi dạ, điểm đánh phản hồi cái nút
ctx.when("Giữa mùa hạ chi dạ").call(lambdad:d.press("back"))
ctx.when("Xác định").call(lambdael:el.click())

# mặt khác thao tác

# vì phương tiện cũng có thể sử dụng số hiệu trung cam chịu pop-up theo dõi logic
# phía dưới là trước mắt nội trí cam chịu logic, có thể thêm đàn at đàn chủ, gia tăng tân logic, hoặc là trực tiếp đề pr
# when( "Tiếp tục sử dụng" ).click()
# when( "Di nhập quản khống" ).when( "Hủy bỏ" ).click()
# when( "^ lập tức ( download | đổi mới )" ).when( "Hủy bỏ" ).click()
# when( "Đồng ý" ).click()
# when( "^( tốt | xác định )" ).click()
withd.watch_context(builtin=True)asctx:
# ở đã có cơ sở thượng gia tăng
ctx.when("@tb:id/jview_view").when('//*[@content-desc= "Hình ảnh" ]').click()

# mặt khác kịch bản gốc logic
Mặt khác một loại phương pháp sáng tác
ctx=d.watch_context()
ctx.when("Thiết trí").click()
ctx.wait_stable()# chờ đợi giao diện không ở có pop-up

ctx.close()Càng đề cử dùng WatchContextPhương pháp sáng tác càng ngắn gọn một ít
You can registerwatchersto perform some actions when a selector does not find a match.
2.0.0 phía trước sử dụng chính là uiautomator-jar kho trung cung cấp [Watcher]((http://developer.android /tools/help/uiautomator/UiWatcher.html) phương pháp, nhưng ở thực tiễn trung phát hiện một khi uiautomator liên tiếp thất bại khởi động lại, sở hữu watcher phối trí đều là mất đi, này khẳng định là vô pháp tiếp thu.
Cho nên trước mắt chọn dùng hậu trường vận hành một cái tuyến trình phương pháp ( ỷ lại threading kho ), sau đó mỗi cách một đoạn thời gian dump một lần hierarchy, xứng đôi đến nguyên tố lúc sau chấp hành tương ứng thao tác.
Cách dùng nêu ví dụ
Đăng ký theo dõi
# thường dùng phương pháp sáng tác, đăng ký nặc danh theo dõi
d.watcher.when("Trang bị").click()

# đăng ký tên là ANR theo dõi, đương xuất hiện ANR cùng Force Close khi, điểm đánh Force Close
d.watcher("ANR").when(xpath="ANR").when("Force Close").click()

# mặt khác hồi điều ví dụ
d.watcher.when("Đoạt bao lì xì").press("back")
d.watcher.when("//*[@text = 'Out of memory']").call(lambdad:d.shell('am force-stop com.im.qq'))

# hồi điều thuyết minh
defclick_callback(d:u2.Device):
d.xpath("Xác định").click()# ở hồi điều trung thuyên chuyển sẽ không lại lần nữa kích phát watcher

d.xpath("Tiếp tục").click()# sử dụng d.xpath kiểm tra nguyên tố thời điểm, sẽ kích phát watcher ( trước mắt nhiều nhất kích phát 5 thứ )

# bắt đầu hậu trường theo dõi
d.watcher.start()
Theo dõi thao tác
# di trừ ANR theo dõi
d.watcher.remove("ANR")

# di trừ sở hữu theo dõi
d.watcher.remove()

# bắt đầu hậu trường theo dõi
d.watcher.start()
d.watcher.start(2.0)# cam chịu theo dõi khoảng cách 2.0s

# cưỡng chế vận hành sở hữu theo dõi
d.watcher.run()

# đình chỉ theo dõi
d.watcher.stop()

# đình chỉ cũng di trừ sở hữu theo dõi, thường dùng với khởi động lại
d.watcher.reset()
Mặt khác hồ sơ vẫn là có rất nhiều không có viết, đề cử trực tiếp đi xem nguyên mãwatcher.py
u2.HTTP_TIMEOUT=60# cam chịu giá trị 60s, http cam chịu thỉnh cầu siêu thời thời gianMặt khác phối trí, trước mắt đã lớn bộ phận tập trung đếnd.settingsTrung, căn cứ hậu kỳ nhu cầu phối trí khả năng sẽ có tăng giảm.
print(d.settings)
{'operation_delay':(0,0),
'operation_delay_methods':['click','swipe'],
'wait_timeout':20.0}

# phối trí điểm đánh trước duyên khi 0.5s, điểm đánh sau duyên khi 1s
d.settings['operation_delay']=(.5,1)

# sửa chữa lùi lại có hiệu lực phương pháp
# trong đó double_click, long_click đều đối ứng click
d.settings['operation_delay_methods']=['click','swipe','drag','press']
d.settings['wait_timeout']=20.0# cam chịu khống kiện chờ đợi thời gian ( nguyên sinh thao tác, xpath cắm kiện chờ đợi thời gian )
Đối với theo phiên bản thăng cấp, thiết trí quá thời hạn phối trí khi, sẽ nhắc nhở Deprecated, nhưng là sẽ không vứt dị thường.
>>> d.settings['click_before_delay'] = 1
[W 200514 14:55:59 settings:72] d.settings[click_before_delay] deprecated: Use operation_delay instead
uiautomator khôi phục phương thức thiết trí
Cẩn thận ngươi khả năng phát hiện, trên thực tế di động trang bị hai cái APK, một cái ở phía trước đài có thể thấy được ( tiểu hoàng xe ). Một cái bao tên làcom.github.uiautomator.testỞ hậu đài không thể thấy. Này hai cái apk sử dụng cùng cái giấy chứng nhận ký tên.
Không thể thấy ứng dụng trên thực tế là một cái thí nghiệm bao, bao hàm có tất cả thí nghiệm số hiệu, trung tâm thí nghiệm phục vụ cũng là thông qua này khởi động.
Nhưng là vận hành thời điểm, hệ thống lại yêu cầu cái kia tiểu hoàng xe vẫn luôn ở vận hành ( ở hậu đài vận hành cũng có thể ). Một khi tiểu hoàng xe ứng dụng bị giết, hậu trường vận hành thí nghiệm phục vụ cũng thực mau sẽ bị giết chết. Liền tính cái gì cũng không làm, ứng dụng ứng dụng ở hậu đài, cũng sẽ thực mau bị hệ thống thu về rớt. ( nơi này hy vọng cao thủ chỉ điểm một chút, như thế nào mới có thể không ỷ lại tiểu hoàng xe ứng dụng, cảm giác lý luận thượng là có thể, nhưng là trước mắt ta còn sẽ không ).
Làm tiểu hoàng xe ở hậu đài vận hành có hai loại phương thức, một loại khởi động ứng dụng sau, phóng tới hậu trường ( cam chịu ). Mặt khác thông quaam startserviceKhởi động một cái hậu trường phục vụ cũng đúng.
Thông quad.settings[ "uiautomator_runtest_app_background" ] = TrueCó thể điều chỉnh nên hành vi. True đại biểu khởi động ứng dụng, False đại biểu khởi động phục vụ.
UiAutomator trung siêu khi thiết trí ( che giấu phương pháp )
>>d.jsonrpc.getConfigurator()
{'actionAcknowledgmentTimeout':500,
'keyInjectionDelay':0,
'scrollAcknowledgmentTimeout':200,
'waitForIdleTimeout':0,
'waitForSelectorTimeout':0}

>>d.jsonrpc.setConfigurator({"waitForIdleTimeout":100})
{'actionAcknowledgmentTimeout':500,
'keyInjectionDelay':0,
'scrollAcknowledgmentTimeout':200,
'waitForIdleTimeout':100,
'waitForSelectorTimeout':0}
Vì phòng ngừa bản cài đặt trình tự hưởng ứng siêu khi,waitForIdleTimeoutCùngwaitForSelectorTimeoutTrước mắt đã sửa vì0
Refs:Google uiautomator Configurator
Loại này phương pháp thông thường dùng cho không biết khống kiện dưới tình huống đưa vào. Bước đầu tiên yêu cầu cắt đưa vào pháp, sau đó gửi đi adb quảng bá mệnh lệnh, cụ thể sử dụng phương pháp như sau
d.send_keys("Ngươi hảo 123abcEFG")# adb quảng bá đưa vào
d.send_keys("Ngươi hảo 123abcEFG",clear=True)# adb quảng bá đưa vào

d.clear_text()# thanh trừ đưa vào khung sở hữu nội dung

d.send_action()# căn cứ đưa vào khung nhu cầu, tự động chấp hành hồi xe, tìm tòi chờ mệnh lệnh, Added in version 3.1
# cũng có thể chỉ định gửi đi đưa vào pháp action, eg: d.send_action( "search" ) duy trì go, search, send, next, done, previousprint(d.current_ime())# thu hoạch trước mặt đưa vào pháp IDCàng nhiều tham khảo:IME_ACTION_CODE
print(d.last_toast)# get last toast, if not toast return None
d.clear_toast()
Fixed in version 3.2.0
Java uiautoamtor trung cam chịu là không duy trì xpath, cho nên nơi này thuộc về mở rộng một cái công năng. Tốc độ không phải như vậy mau.
For example: Trong đó một cái tiết điểm nội dung
<android.widget.TextView
index="2"
text="05:19"
resource-id="com.netease.cloudmusic:id/qf"
package="com.netease.cloudmusic"
content-desc=""
checkable="false"checked="false"clickable="false"enabled="true"focusable="false"focused="false"
scrollable="false"long-clickable="false"password="false"selected="false"visible-to-user="true"
bounds="[957,1602][1020,1636]"/>
xpath định vị cùng sử dụng phương pháp
Có chút thuộc tính tên có sửa chữa yêu cầu chú ý
description -> content-desc
resourceId -> resource-id
Thường thấy cách dùng
# wait exists 10s
d.xpath("//android.widget.TextView").wait(10.0)
# find and click
d.xpath("//*[@content-desc=' chia sẻ ']").click()
# check exists
ifd.xpath("//android.widget.TextView[contains(@text, 'Se')]").exists:
print("exists")
# get all text-view text, attrib and center point
forelemind.xpath("//android.widget.TextView").all():
print("Text:",elem.text)
# Dictionary eg:
# {'index': '1', 'text': '999+', 'resource-id': 'com.netease.cloudmusic:id/qb', 'package': 'com.netease.cloudmusic', 'content-desc': '', 'checkable': 'false', 'checked': 'false', 'clickable': 'false', 'enabled': 'true', 'focusable': 'false', 'focused': 'false','scrollable': 'false', 'long-clickable': 'false', 'password': 'false', 'selected': 'false', 'visible-to-user': 'true', 'bounds': '[661,1444][718,1478]'}
print("Attrib:",elem.attrib)
# Coordinate eg: (100, 200)
print("Position:",elem.center())
Điểm đánh xem xétMặt khác XPath thường thấy cách dùng
Video thu ( vứt đi ), sử dụngscrcpyTới thay thế đi
Nơi này không có sử dụng di động trung tự mang screenrecord mệnh lệnh, là thông qua thu hoạch di động hình ảnh hợp thành video phương pháp, cho nên yêu cầu trang bị một ít mặt khác ỷ lại, như imageio, imageio-ffmpeg, numpy chờ Bởi vì có chút ỷ lại khá lớn, đề cử sử dụng cảnh trong gương trang bị. Trực tiếp vận hành phía dưới mệnh lệnh là được.
pip3 install -U"uiautomator2[image]"-i https://pypi.doubanio /simpleSử dụng phương pháp
d.screenrecord('output.mp4')

time.sleep(10)
# or do something else

d.screenrecord.stop() # đình chỉ thu sau, output.mp4 văn kiện mới có thể mở ra
Thu thời điểm cũng có thể chỉ định fps ( trước mặt là 20 ), cái này giá trị là suất thấp hơn minicap phát ra hình ảnh tốc độ, cảm giác đã thực hảo, không kiến nghị ngươi sửa chữa.
fromuiautomator2importenable_pretty_logging
enable_pretty_logging()
Or
logger = logging.getLogger( "uiautomator2" )
# setup logger
Python trình tự rời khỏi, UiAutomation liền rời khỏi. Bất quá cũng có thể thông qua tiếp lời phương pháp đình chỉ phục vụ
d.stop_uiautomator()https:// cnblogs /insist8089/p/6898181.html
- Tân tăng tiếp lời: UiObject2, Until, By, BySelector
- Dẫn vào phương thức: 2.0 trung, com.android.uiautomator.core.* dẫn vào phương thức bị vứt đi. Sửa vì android.support.test.uiautomator
- Xây dựng hệ thống: Maven cùng / hoặc Ant ( 1.x ); Gradle ( 2.0 )
- Sinh ra thí nghiệm bao hình thức: Từ zip /jar ( 1.x ) đến apk ( 2.0 )
- Ở bản địa hoàn cảnh lấy adb mệnh lệnh vận hành UIAutomator thí nghiệm, khởi động phương thức khác biệt:
adb shell uiautomator runtest UiTest.jar -c package.name.ClassName ( 1.x ) adb shell am instrument -e class com.example.app.MyTest com.example.app.test/android.support.test.runner.AndroidJUnitRunner ( 2.0 ) - Có không sử dụng Android phục vụ cập tiếp lời? 1.x
Không thể; 2.0Có thể. - og phát ra? Sử dụng System.out.print phát ra lưu hồi hiện đến chấp hành đoan ( 1.x ); phát ra đến Logcat ( 2.0 )
- Chấp hành? Thí nghiệm dùng lệ không cần kế thừa với bất luận cái gì phụ loại, phương pháp danh không hạn, sử dụng chú giải Annotation tiến hành ( 2.0 ); yêu cầu kế thừa UiAutomatorTestCase, thí nghiệm phương pháp yêu cầu lấy test mở đầu (1.x)
- uiautomator jsonrpc serverhttps://github /openatx/android-uiautomator-server/
uiautomator bảo hộ trình tựhttps://github /openatx/atx-agent
- codeskyblue (@codeskyblue)
- Xiaocong He (@xiaocong)
- Yuanyuan Zou (@yuanyuan)
- Qian Jin (@QianJin2013)
- Xu Jingjie (@xiscoxu)
- Xia Mingyuan (@mingyuan-xia)
- Artem Iglikov, Google Inc. (@artikz)
Othercontributors
- https://github /atinfo/awesome-test-automationSở hữu ưu tú thí nghiệm dàn giáo tập hợp, bao hàm toàn diện
- google/moblyGoogle bên trong thí nghiệm dàn giáo, tuy rằng ta không hiểu lắm, nhưng là cảm giác thực dùng tốt
- https://github /zhangzhao4444/MaximCăn cứ vào Uiautomator monkey
- http:// sikulix /Căn cứ vào hình ảnh phân biệt tự động hoá thí nghiệm dàn giáo, phi thường nhãn hiệu lâu đời
- http://airtest.netease /Bổn hạng mục đời trước, sau lại bị võng dễ Quảng Châu đoàn đội tiếp nhận cũng tiếp tục ưu hoá. Thực hiện có một cái không tồi IDE
Xếp hạng có trước sau, hoan nghênh bổ sung